
Instruction
Installation guide
Follow this guide when installing indoor climate sensors.
Placement in the room
- Install the sensor in the living room
- Mount it on a warm internal wall
- Place it at a height of 130 – 180 cm
- Position it out of direct sunlight during the day
- Never place it above a radiator or other heat source
Mounting the sensor
For a secure and durable mount, do the following:
- Step 1Clean the surface
- Step 2Check that the surface is dry, wipe with a dry cloth if needed
- Step 3Remove the tape backing from the sensor
- Step 4Mount the sensor on the cleaned surface. Press for 20 seconds
Register the sensor
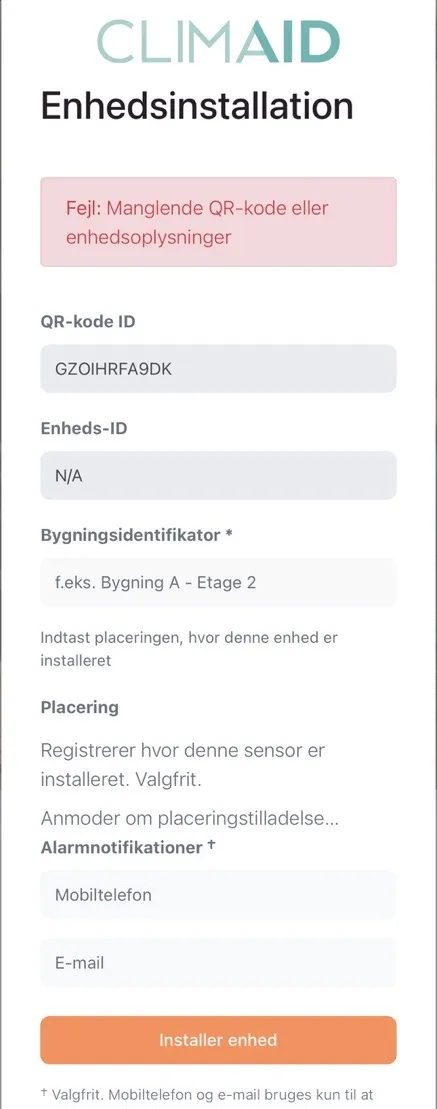
- Scan the QR code on the front of the sensor. The phone opens the Device installation screen.
- Check that QR code ID and Device ID are filled in. If they read N/A, scan again.
- Enter the apartment number, room or address in the Building identifier field. This field is required.
- Allow location access if the phone asks. Optional.
- Fill in Alarm notifications if someone should be notified about alarms from this particular sensor. Optional.
- Tap Install device. When the apartment number is entered correctly, a confirmation appears. If something went wrong, the error is shown at the top of the screen.
Questions during installation: contact CLIMAID support.